
Charts - Make your data presentable


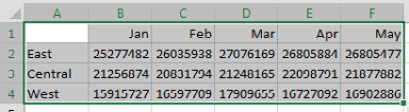
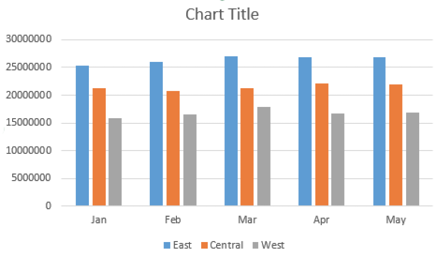
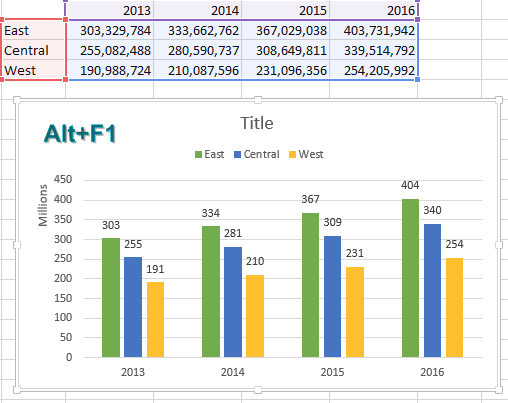
One-click charts are easy: Select the data and press Alt+F1.

Three regions appears in A2:A4. Five months appear in B1:F1. Numbers appear in B2:F4. The top-left corner cell A1 is blank. You have A1:F4 selected.
Press Alt+F1 and you get a default chart: Clustered Columns, with legend at the bottom and a title of Chart Title at the Top.

What if you would rather create bar charts instead of the default clustered column chart? To make your life easier, you can change the default chart type. Store your favorite chart settings in a template and then teach Excel to produce your favorite chart in response to Alt+F1.

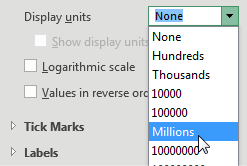
Say that you want to clean up the chart above. All of those zeros on the left axis take up a lot of space without adding value. Double-click those numbers and change Display Units from None to Millions.

Change the Display Units for the chart axis. Choices are None, Hundreds, Thousands, 10000, 100000, Millions, and so on, up to Trillions.

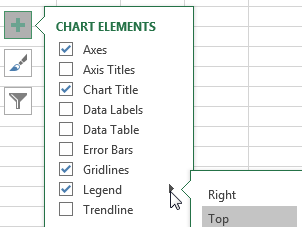
To move the legend to the top, click the + sign next to the chart, choose the arrow to the right of Legend, and choose Top.

Click the Plus icon to the right of the chart. Hover over the entry for Legend and choose Top as the location.

Change the color scheme to something that works with your company colors.

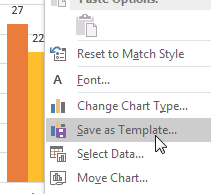
Right-click the chart and choose Save As Template. Then, give the template a name. (I called mine ClusteredColumn.)

The context menu for a chart offers Reset to Match Style, Font, Change Chart Type, Save as Template, Select Data, and Move Chart. Choose Save as Template.

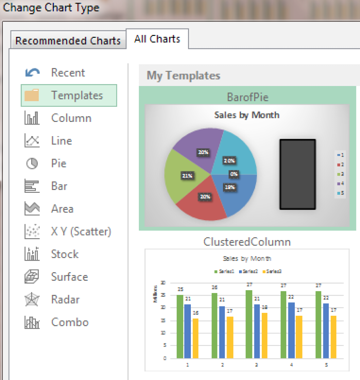
Select a chart. In the Design tab of the Ribbon, choose Change Chart Type. Click on the Templates folder to see the template that you just created.

After setting up a template, the All Charts tab in the Change Chart Type dialog offers a new category at the top called Templates.

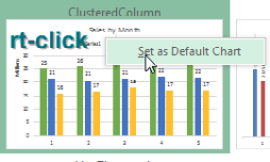
Right-click your template and choose Set As Default Chart.

In the Dialog box with all of the chart types, right-click on any chart tile and choose Set As Default Chart.

The next time you need to create a chart, select the data and press Alt+F1. All your favorite settings appear in the chart.

After customizing the Default Chart, the legends appear at the top, the left axis is in millions. Data labels (also in millions) appear above each column.

Comments

Popular posts from this blog

Up and Down Markers using Conditional Formatting

There is a super-obscure way to add up/down markers to a pivot table to indicate an increase or a decrease. Somewhere outside the pivot table, add columns to show increases or decreases. In the figure below, the difference between I6 and H6 is 3, but you just want to record this as a positive change. Use  SIGN(I6-H6)  to get either +1, 0, or -1. Select the two-column range showing the sign of the change and then select Home, Conditional Formatting, Icon Sets, 3 Triangles. (I have no idea why Microsoft called this option 3 Triangles, when it is clearly 2 Triangles and a Dash, as shown below.) With the same range selected, now select Home, Conditional Formatting, Manage Rules, Edit Rule. Check the Show Icon Only checkbox. With the same range selected, press  Ctrl+C  to copy. Select the first Tuesday cell in the pivot table. From the Home tab, open the Paste dropdown and choose Linked Picture. Excel pastes a live picture of the icons above the table. At this point, adju...

Indirect Function

INDIRECT  is pretty cool for grabbing a value from a cell. Can  INDIRECT  point to a multi-cell range and be used in a  VLOOKUP  or  SUMIF  function?  You can build an  INDIRECT  function that points to a range. The range might be used as the lookup table in a  VLOOKUP  or as a range in  SUMIF  or  COUNTIF . In  Figure , the formula pulls data from the worksheets specified in row 4. The second argument in the  SUMIF  function looks for records that match a certain date from column A. Note:  Because each worksheet might have a different number of records, I chose to have each range extend to 300. This is a number that is sufficiently larger than the number of transactions on any sheet. The formula in cell B5 is: =SUMIF(INDIRECT(B$4&"!A2:A300"), $A5, INDIRECT(B$4&"!C2:C300")) Summary:  You can use  INDIRECT  to grab data from a multi-cell range.

Create Sum that gives summary of all Worksheets in Excel

  You have a workbook with 12 worksheets, 1 for each month. All of the worksheets have the same number of rows and columns. You want a summary worksheet in order to total January through December. To create it, use the formula  =SUM(January:December!B4) . Copy the formula to all cells and you will have a summary of the other 12 worksheets. Caution I make sure to never put spaces in my worksheet names. If you do use spaces, the formula would have to include apostrophes, like this:  =SUM('Jan 2018:Mar 2018'!B4) .